
- Education
- Diamond Anatomy & Light
- ASET and Idealscope Images Explained: Reading Light in a Diamond
Diamond Anatomy & Light
ASET and Idealscope Images Explained: Reading Light in a Diamond
ASET and Idealscope images show what a normal photo cannot: where a diamond returns light and where it lets light escape. Once you can read the colours, you can compare the cut of two stones in seconds, even online.
 Reviewed by Raj Sood, Graduate Gemologist (GIA), AJP (GIA)Master jeweller and Graduate Gemologist (GIA) · reviewed 4 November 2026
Quick answer
ASET and Idealscope images are reflector photos that map how a diamond handles light. In both, red shows strong light return and white or clear areas show leakage. ASET adds green for lower-angle light and blue for contrast from your head, which Idealscope shows as black. Look for even red, a crisp symmetrical pattern and little white.
What are ASET and Idealscope images?
ASET (Angular Spectrum Evaluation Tool) and the Idealscope are small viewers that look at a diamond through a coloured reflector. Instead of the sparkle you see in an ordinary photo, you get a colour map showing where light enters the stone, bounces around inside and comes back out to your eye, and where it escapes instead. Graders and jewellers use these images to judge cut, the part of a diamond's appearance that colour and clarity grades do not describe.
Both tools exist because cut is really about angles. Light enters through the crown (the top section above the girdle), reflects off the pavilion facets (the lower, pointed section) and should come back out through the top. If you want a refresher on the parts of a diamond, from table to culet, start there. When the angles are right, most light returns; when they are off, light leaks out through the pavilion and that area looks glassy or dark face-up.
ASET was developed by the American Gem Society (AGS), which used it in its light performance grading. The Idealscope was developed in Australia by Garry Holloway, building on an earlier Japanese reflector viewer known as the Firescope. The two answer slightly different questions, which is why many people like to see both images for the same stone.
Neither image is a grade on its own. Think of them as a cut X-ray that sits alongside the grading report, the video and your own eyes. Our guide to how diamonds return light puts them in context with the other tools, and any unfamiliar term here is defined in the full jewellery glossary.
How do ASET and Idealscope viewers work?
Diamond has a high refractive index, about 2.42, which bends light strongly as it enters. Inside the stone, any light that strikes a pavilion facet at more than the critical angle (about 24.4° from the perpendicular for diamond) is reflected back inside instead of passing out. Good cutting sets the pavilion so that most light hits it at those steep angles, reflects across to the opposite side and then travels up and out through the crown.
A reflector viewer surrounds the diamond with coloured zones. Whatever colour you see in a facet tells you which direction the light in that facet came from. If you see the reflector colour, the facet is returning light from that zone. If you see through to the white background or the room, the facet is not returning light at all: that is leakage.
The viewer also shows obscuration, the light blocked by your own head and body when you lean over a ring. Some obscuration is a good thing, because it creates the dark facets that contrast with the bright ones and make sparkle visible. Too much in one place and the stone looks dark in patches. How the facets balance bright and dark is covered in our explanation of brilliance, fire and scintillation.
Which zone each facet sees depends mainly on two numbers: the crown angle and the pavilion angle. Our page on how crown and pavilion angles steer light shows the geometry. For a round brilliant, a crown angle of about 34–35° paired with a pavilion angle of about 40.6–41.0° tends to give the even red pattern you hope to see.
How to read an ASET image: what do the colours mean?
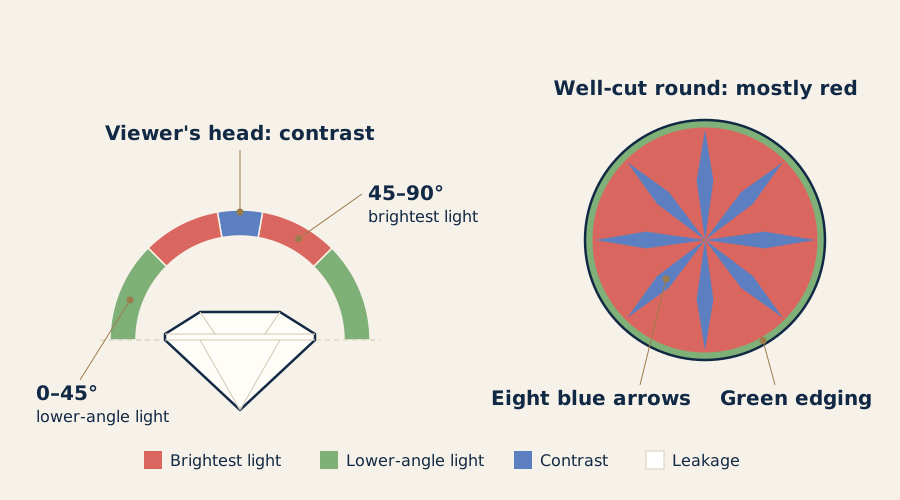
ASET uses three colours plus the background, each tied to a band of angles above the horizon of the stone:
| ASET colour | Light it represents | What you want to see |
|---|---|---|
| Red | The brightest light, arriving from about 45–90° above the horizon (overhead) | Most of the face-up area, spread evenly |
| Green | Less intense light from about 0–45° (lower, side-on light) | A thin, even pattern; large green areas mean less brightness under overhead light |
| Blue | Light blocked by the viewer's head and body (obscuration, or contrast) | A crisp, symmetrical pattern, not big patches |
| White (sometimes black) | Leakage: light passing straight out of the stone | As little as possible, especially under the table |
A well-cut round in ASET looks mostly red, with a blue pattern that repeats evenly around the stone and a fine edging of green. In a hearts and arrows round, the blue often forms eight neat arrow shapes. When the blue arrows are uneven in width or twisted, the optical symmetry is off, even if the grading report says Excellent symmetry.
Green is not a fault in itself. It shows the stone is gathering light from lower angles, which still returns some brightness, especially in diffuse light such as an office. But when green replaces red over large areas, the diamond is likely to look less bright under downlights or daylight from above.
White areas need the closest look. White under the table of a round usually points to a pavilion angle that is too shallow or too steep. White near the edges, the girdle or the points of a fancy shape shows light escaping there, which reads as a glassy or grey patch in real life.
How do you read an Idealscope image?
The Idealscope is simpler. It uses a red reflector with a central viewing hole, so you only need to read three things:
- Red: light returning to the eye. Deeper, more saturated red means stronger return.
- Pink or white: weak return or leakage. Pale pink is light partly escaping; white or clear is light passing straight through.
- Black: obscuration from the viewing hole and your head. In balanced amounts it is the contrast pattern that makes sparkle readable.
In a well-cut round, an Idealscope image shows even, saturated red across the stone, eight black arrows of equal width pointing to the centre and no pale ring under the table edge. A pale ring just inside the table often means the pavilion is slightly steep. A washed-out pink centre suggests a shallow pavilion that is letting light leak through the middle.
The Idealscope is often used together with a hearts and arrows viewer, which shows the facet alignment rather than light return. Our guide to the hearts and arrows scope explains what those patterns add.
Related guideHearts and Arrows Viewer ExplainedNot sure which one is right?
Send us the stones you are looking at and our gemologist will tell you which to choose and why.
ASET vs Idealscope: which tells you more?
| ASET | Idealscope | |
|---|---|---|
| Developed by | American Gem Society (AGS) | Garry Holloway, Australia |
| Colours | Red, green, blue, white | Red, pink, black, white |
| Shows the angle light comes from | Yes: high (red) versus low (green) | No: red covers a broad range |
| Shows leakage | Yes, as white | Yes, as pink or white |
| Shows contrast | Yes, as blue | Yes, as black |
| Easiest for | Judging brightness and contrast balance | Spotting leakage quickly |
| Fancy shapes | Very useful; shows bow-ties and corner leakage clearly | Useful; leakage stands out, angle detail is lost |
| On grading reports | Included on some past AGS reports | Not on standard lab reports |
| Handheld viewer | Inexpensive, roughly AUD $50–$250 | Inexpensive, roughly AUD $50–$200 |
In short: the Idealscope answers 'is light leaking?', and ASET answers 'where is the returning light coming from, and is the contrast balanced?'. A stone that looks good in both is very likely to be well cut. A stone that looks good in one but not the other deserves a closer look at its proportions, rather than an automatic no.
What do ASET and Idealscope images show in fancy shapes?
Fancy shapes have no single ideal set of angles, because the angle changes as you move around an oval or pear outline. That is exactly where reflector images earn their keep: they show you the trouble spots that proportions on a report cannot.
The most common is the bow-tie, a dark band across the middle of elongated shapes. In ASET it usually shows as a band of blue (obscuration) or, if it is leakage, white. In an Idealscope it shows as black or pale pink. A faint bow-tie is normal; a solid one that dominates the image will look dark on the hand. Our page on the bow-tie in ovals, pears and marquises has examples.
| Shape | Where problems show in the images | Typical total depth (guide only) |
|---|---|---|
| Round | Pale ring under the table edge (steep) or pale centre (shallow) | 59–62.5% |
| Oval | Bow-tie across the width | 58–63% |
| Pear | Bow-tie, leakage in the point and shoulders | 58–64% |
| Marquise | Bow-tie, leakage in both tips | 58–63% |
| Cushion | Leakage or dark zones under the table, weak corners | 61–68% |
| Radiant | Leakage at the cut corners | 61–67% |
| Princess | Leakage at the four corners | 68–74% |
| Emerald | Central window; broad dark bands are normal in step cuts | 61–68% |
For shape-by-shape numbers, see the pear proportion ranges, the cushion depth and table chart and the radiant proportions chart. Step cuts such as emeralds and Asschers are read differently: the broad flashes and dark bands of the 'hall of mirrors' are part of the look, so focus on leakage in the centre rather than on how much red you see. Our page on windowing in different shapes shows how much centre leakage each cut can carry before it looks glassy.
Which cutting problems can you spot in the images?
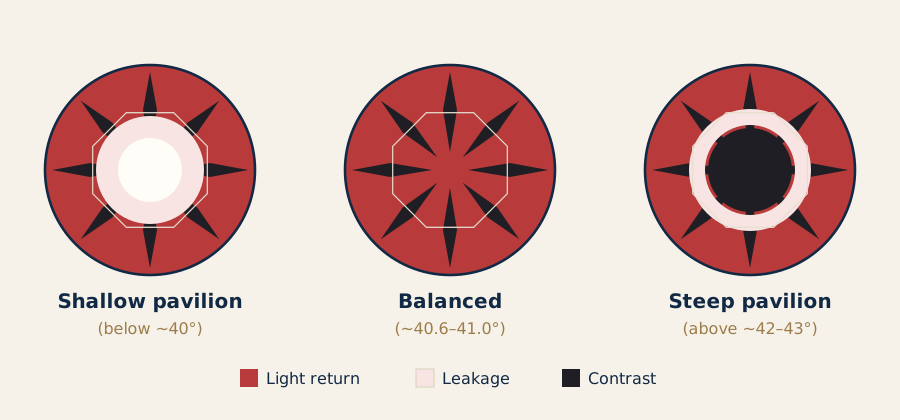
- Windowing: a pale or white area under the table from a shallow pavilion (in rounds, roughly below 40°). The stone looks watery in the middle.
- Fisheye: a very shallow pavilion (roughly below 38–39° in rounds) reflects the girdle as a grey ring under the table. In reflector images it shows as a ring of pale or white.
- Nailhead: a steep pavilion (roughly above 42–43° in rounds) leaks light out the sides, leaving a dark centre. In ASET the centre fills with blue or black rather than red.
- Extinction: dark areas that stay dark as the stone moves. In fancy shapes these often line up with blue or black zones in the image.
- Uneven pattern: arrows or contrast patches of different widths, a sign of poor optical symmetry.
Each of these has its own page. See the dark nailhead centre and extinction and dark zones for photos and causes. Many of them trace back to the overall depth and table size, which our explainer on table and depth percentages sets out.
Leakage often comes with a trade-off. A shallow stone spreads wider, so it looks bigger for its weight, but returns less light. A deep stone holds weight underneath and looks smaller face-up. If you are weighing size against brightness, our guide to spread and face-up size helps you find the middle ground.
Do ASET and Idealscope images matter for lab-grown diamonds?
Yes, exactly as much. Lab-grown diamonds are real diamond, with the same refractive index and the same optics as natural diamonds, so a reflector viewer reads them the same way. What differs is cutting practice. Some laboratory-grown stones are cut for maximum spread or weight rather than light return, so it is worth checking their images as closely as you would a natural stone's.
Reflector images also have limits. They do not show colour grade, most inclusions or fluorescence. They cannot show a hazy or milky stone, because a hazy diamond can still return light in the right directions; see how transparency and haziness affect sparkle for that. And they are still photos, so they show one moment of a stone that you will see moving. Use them with the video, not instead of it.
Browse natural and lab-grown diamonds
How do you use ASET and Idealscope images when comparing diamonds?
- Shortlist on the report first. Narrow down by shape, carat, colour and clarity, and confirm whether each stone is natural or lab-grown.
- Ask for both images. Request an ASET and an Idealscope image for each stone, taken face-up and straight on.
- Check the leakage. Look for white or pale pink under the table, at the edges and in any points or corners. Less is better.
- Check the red. In ASET, red should cover most of the stone with green as a thin edging. In the Idealscope, the red should be deep and even.
- Check the contrast pattern. Blue in ASET or black in the Idealscope should be crisp and symmetrical. In elongated shapes, note how strong the bow-tie is.
- Match the images to the video. Dark or glassy areas in the images should match what you see as the stone turns; if they do not, ask for a retake.
- Compare like with like. Judge rounds against rounds and ovals against ovals, since every shape has its own normal pattern.
Free consultation
Talk to a gemologist
Compare stones in person or online with Raj Sood, Graduate Gemologist (GIA), AJP (GIA).
Book a consultationShop this shape
FAQ
Common questions
What does red mean in an ASET image?
Red shows the brightest light, arriving from about 45–90° above the stone. A diamond that is mostly red in ASET should look bright under overhead lighting.
What does white mean in an Idealscope image?
White or very pale pink shows light leakage, where light passes out through the pavilion instead of returning to your eye. In real life these areas look glassy or grey.
Is blue bad in an ASET image?
No. Blue shows contrast from your own head blocking the light, and an even, symmetrical blue pattern is what makes sparkle visible. Large blue patches, such as a heavy bow-tie, are the concern.
Do GIA reports include ASET images?
Standard GIA and IGI reports do not include an ASET image. Some AGS reports have included one, and many jewellers can take ASET or Idealscope images for you on request.
Can ASET and Idealscope images be used on fancy shapes?
Yes, and they are especially helpful there because fancy shapes have no single ideal angle. They show bow-ties, corner leakage and dark zones clearly, though step cuts like emeralds are read differently from brilliants.
Do lab-grown diamonds look different in ASET images?
No. Lab-grown diamonds have the same optics as natural diamonds, so the colours mean exactly the same thing. Any difference comes from how the individual stone was cut.
Ask a gemologist
Not sure which diamond to choose?
Raj Sood is a Graduate Gemologist (GIA) and master jeweller. Bring the stones you are considering, or send the reports, and he will tell you honestly which one is better and why.
Keep learning
Related guides
 Diamond Anatomy & LightHearts and Arrows Viewer Explained
 Diamond Anatomy & LightExtinction and Dark Zones in DiamondsDiamond Anatomy & LightDiamond Light Performance Guide
 Diamond Anatomy & LightDiamond Bow Tie EffectDiamond Anatomy & LightAnatomy of a diamond: table, crown, girdle, pavilion and culet explained
 Diamond Anatomy & LightWindowing Across Diamond Shapes
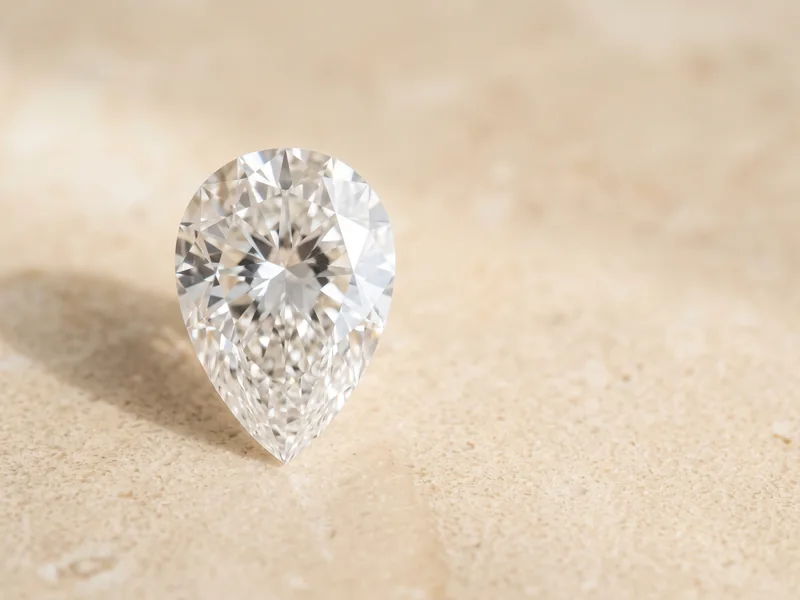 Diamond Anatomy & LightIdeal Proportions Chart: Pear Diamonds
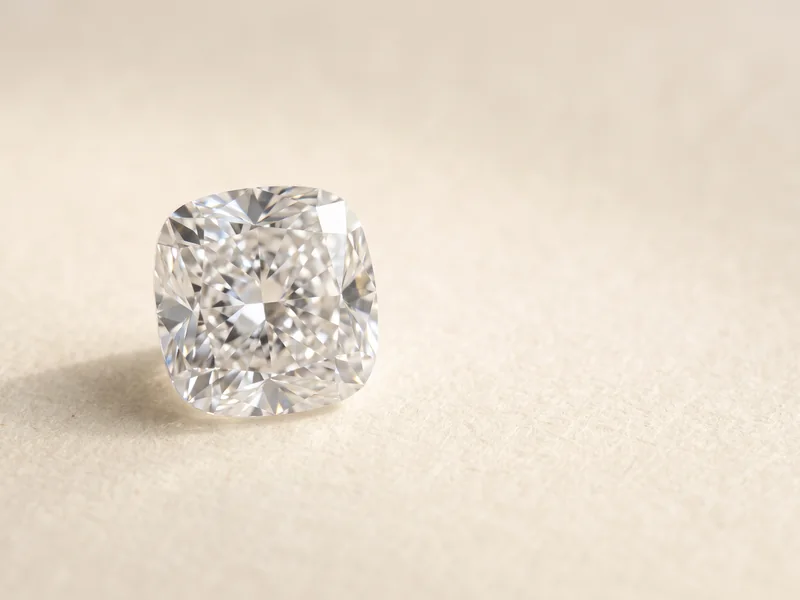 Diamond Anatomy & LightIdeal Proportions Chart: Cushion Diamonds
Explore more
More guides on this topic
Education